
Making bread has become a regular thing in my home over the last few years. I decided to infuse some flavour into this recipe to add a bit of sweet to our mornings. This cinnamon swirl bread is perfect for that.

If you are simply going to toast it with some butter or elevate you French toast. Even if you want to just cut yourself a big slice and enjoy e delicious and sweet slice of cinnamon swirl bread I highly recommend you stick around and make this recipe this weekend.
A lot of people I know claim they could never make their own bread or that they just don’t have the time required to do so. Let me se the record straight. When I say “if I can do it so can you” i truly mean it.
I used to be one of those people who couldn’t even bake a batch of cookies with out them burning or being under baked. My first loaf of bread was solid and could break windows. but once I got a few practices in and really learned the whole techniques and tips by bread making has improved completely.
You can do it!
the time commitment is actually a lot less than you may think. yes it needs to rest and rise. but during that time it has nothing to do with you and everything to do with time. set yourself a timer and get some housework or me time taken care of.
play with the kids, read a book, hell even take a nap and come back when the timer calls you.
total hands on time is about 20 min at most per loaf and you can do that no problem.
I have been learning also a lot about sourdough an perfecting some of my recipes with that so make sure you come back and subscribe to any of my social media accounts to be sure you don’t miss a thing.

Ingredients you will need
- Water room temperature – you should be able to hold you hand in the water and not feel cold or hot. cold water wont allow the yeast to do what it is that it needs to do and hot water might burn the yeast.
- active dry yeast- make sure your yeast stays fresh by storing it in the fridge and using before the best before date
- granulated sugar- this is to feed the yeast to create the bubbles
- all purpose flour- you can use bread or whole wheat flour. these will both change the texture of the bread and might adjust your resting time slightly. Using whole wheat flour in particular I noticed that I did need to allow the dough to ride a bit longer before baking to ensure a less dense loaf.
- Table salt – Kosher or pink salt will work as well, this gives the bread some flavour
- vegetable oil – use vegetable oil in my baking because it is cost effective and doesn’t have a super strong flavour that will over power the recipe.
- Cinnamon- ground dry cinnamon
- Granulated sugar- this is optional, if you don’t want a sweeter favour ad just have the cinnamon that is also an option.
How to make Cinnamon Swirl Bread
This post is a recipe done all by hand, you can use a stand mixer if you have one and would like to. I have instructions on using the stand mixer on my perfect sandwich bread post. You can use those instructions to adapt this recipe to use your stand mixer.
1. Proof your yeast
In a large bowl add water, yeast and sugar. Using a fork or small spoon give the ingredients a quick stir then allow to proof for around 5 minutes until yeast becomes foamy. if the yeast does not react after 5 minutes you may have burned the yeast, used water that is too cold or your yeast is expired.

most recipes including this one don’t required proofing the yeast. I like to add this step to make sure my yeast is still working and fresh and I don’t waste my time or ingredients on a recipe that won’t turn out. if your yeast is reacting you can move in freely to the next steps.
2. Add the remaining ingredients
add flour and salt, and use a wooden spoon to bring all the ingredients in the bowl together until you can no longer see any liquid at the bottom of the bowl.

3. Knead the dough
turn the ingredients out onto a clean dry surface and begin kneading with clean hands.
the dough will begin to come together and will become sticky, do not add any extra flour just continue to knead the dough until it starts to hold together and become a smooth ball of dough. once the dough starts to become a little less sticky, you can take a minute to wash the stuck dough from your hands and come back the kneading with clean dry hands.

sometimes the dough is only sticking to the dough that is stuck to your hands and wont come together as you want it to.
the dough will begin to firm up and resist the kneading over time. this is when you are ready to let the dough go through its first rise. you should be able to poke a dent into the dough with your finger and it will spring back fairly quickly and level out as if you have never made the dent at all.

4. First rise
place the dough into a large bowl that has been lightly sprayed with a cooking spray. cover loosely with plastic wrap and place in a warm spot in your kitchen to rise for 1 hour. Till it has doubled in size.

If your home is a little on the cooler side you can place the bowl in the oven, sometimes the closed in space will allow it to stay a few degrees warmer and will help with the rising process. Additionally you can turn on your oven light to create a slighter warmer space or some ovens even come with a bread proofing setting that can help.
if you choose to use either of these setting be sure to keep an eye on your bread as it rises. It will rise faster and you don’t want to over proof your loaf. allow the dough to double in size and not too much more.

5. Punch it down
once the dough has risen remove the plastic wrap carefully and punch the dough down in the middle. This is honestly one of my favorite parts, get a little punch in there and move on.

the dough should instantly deflate to be almost its original size.

6. Prepare the loaves
prepare the two bread pans by spraying with an oven-safe cooking spray making sure you have covered the entire pan.
turn the dough out onto a clean dry surface and using a knife or bread scrapper divide the dough in half.

flatten each half into a long rectangle about 1 inch smaller than the length of your bread pan, and 12 to 15 inches long.
mix the cinnamon and sugar in a bowl and sprinkle all over the dough.
use your hands to press the cinnamon mixture slightly into the dough.

starting at one of the small ends begin to roll the dough. as tightly as possible and even pull slightly to stretch the dough thinner as you roll. The more you roll the tighter coil you will get.

pinch the ends together and the edge of the roll so that you can not see any of the filling. if you have some that have spilled out onto the counter you can roll the dough into it to create a bit of flavour on the outside of the loaf.
repeat the filling and rolling steps with the second loaf (I chose not to fill my second loaf and have it as a plain white sandwich loaf for making lunches the next day)
place the rolled loaves seam side down the prepared loaf pans, and lightly cover again with plastic wrap that has been sprayed with a bit of cooking oil.

7. Second rise
Allow it to rise for 1 more hour until it has doubled in size.

8. Bake
preheat the oven to 375℉ (using the convection setting if you have it)
remove the plastic wrap very carefully so you don’t accidentally deflate the bread. place pans on the middle rack of the stove and bake for 30 minutes,

remove the baked loaves from the oven, they should be a beautiful golden brown colour and sound hallow if you were to knock on the to with one finger,
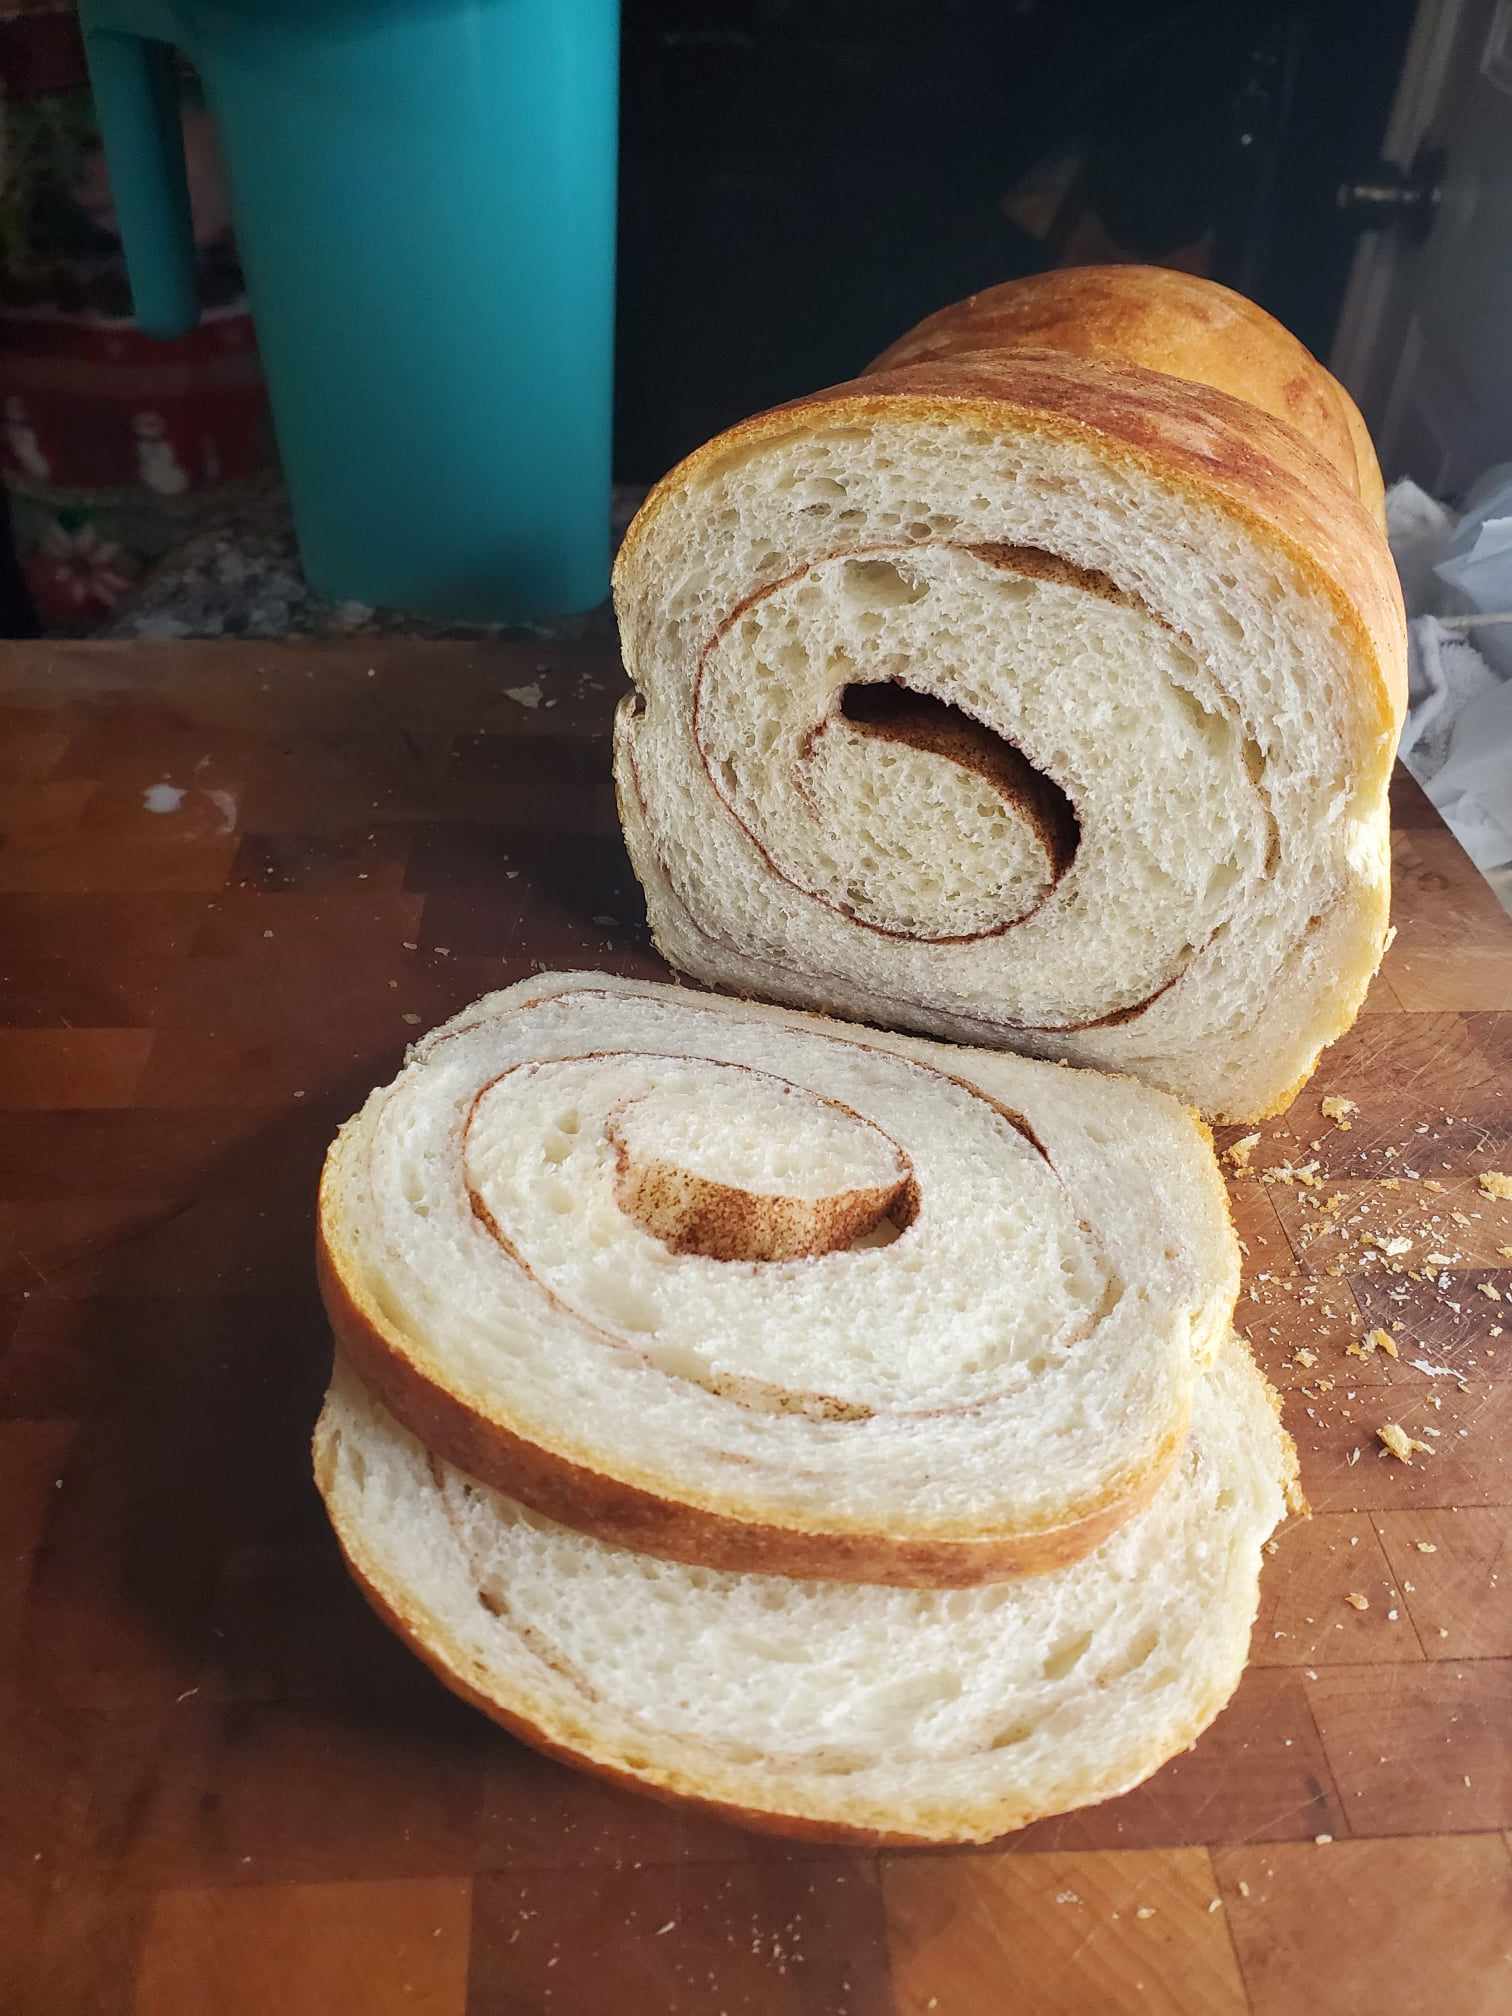
9. Allow the cinnamon swirl bread to cool
Immediately remove the warm loaves from the pans and allow them to cool on the baking rack completely. if you leave them in the pan to cool they will build up condensation and wont come out of the pan verry well. also they will developed a texture that we do not want,
wait for them to cool completely before cutting them open. they are still baking inside and slicing them into a warm loaf will result in an under cooked gummy texture. I know its hard to wait, they smell so good and warm bread is the dream. If you bake 2 loaves and sacrifice one for a warm slice I understand, just make sure you let it cool at least a little bit first before slicing and allow the second loaf to cool completely so you can see what I mean.

Enjoy your loaf of cinnamon swirl bread, With the price of groceries these days being able to bake home made bread will change the way you can stretch your groceries to the next week.
This cinnamon swirl bread made the most amazing French toast this morning. If for nothing else making it for this reason is reason enough!

If you’re like me you may even take bread and other products off your grocery list entirely.
Have kids? like to celebrate? Make these super cute swirls into your bread and have some fun with colour!
This is for Halloween but you can use any colour to celebrate different holidays, birthdays or just spice up an otherwise boring lunch for your picky eater.


Cinnamon Swirl Bread
Equipment
- 2 9.5×5 inch loaf pans glass preferred
- 1 large bowl
- 1 cooling rack
Ingredients
- 2½ cup Water room temperature
- 1 tbsp active dry yeast
- 1 tbsp granulated sugar
- 6½ cup all purpose flour
- 2 tsp table salt
- ¼ cup vegetable oil
- 1 tbsp cinnamon
- ½ tbsp granulated sugar
Instructions
- In a large bowl add water, yeast and sugar. Using a fork or small spoon give the ingredients a quick stir then allow to proof for around 5 minutes until yeast becomes foamy.
- add flour and salt, and use a wooden spoon to bring all the ingredients in the bowl together until you can no longer see any liquid at the bottom of the bowl.
- turn the ingredients out onto a clean dry surface and begin kneading with clean hands.
- the dough will begin to come together and will become sticky, do not add any extra flour just continue to knead the dough until it starts to hold together and become a smooth ball of dough.
- the dough will begin to firm up and resist the kneading over time. this is when you are ready to let the dough go through its first rise. you should be able to poke a dent into the dough with your finger and it will spring back fairly quickly and level out as if you have never made the dent at all.
- place the dough into a large bowl that has been lightly sprayed with a cooking spray. cover loosely with plastic wrap and place in a warm spot in your kitchen to rise for 1 hour. Till it has doubled in size.
- once the dough has risen remove the plastic wrap carefully and punch the dough down in the middle.
- the dough should instantly deflate to be almost its original size.
- prepare the two bread pans by spraying with an oven-safe cooking spray making sure you have covered the entire pan.
- turn the dough out onto a clean dry surface and using a knife or bread scrapper divide the dough in half.
- flatten each half into a long rectangle about 1 inch smaller than the length of your bread pan, and 12 to 15 inches long.
- mix the cinnamon and sugar in a bowl and sprinkle all over the dough.
- use your hands to press the cinnamon mixture slightly into the dough.
- starting at one of the small ends begin to roll the dough. as tightly as possible and even pull slightly to stretch the dough thinner as you roll. The more you roll the tighter coil you will get.
- pinch the ends together and the edge of the roll so that you can not see any of the filling. if you have some that have spilled out onto the counter you can roll the dough into it to create a bit of flavour on the outside of the loaf.
- repeat the filling and rolling steps with the second loaf (I chose not to fill my second loaf and have it as a plain white sandwich loaf for making lunches the next day)
- place the rolled loaves seam side down the prepared loaf pans, and lightly cover again with plastic wrap that has been sprayed with a bit of cooking oil. then allow it to rise for 1 more hour until it has doubled in size.
- preheat the oven to 375℉ (using the convection setting if you have it)
- remove the plastic wrap very carefully so you don't accidentally deflate the bread. place pans on the middle rack of the stove and bake for 30 minutes,
- remove the baked loaves from the oven, they should be a beautiful golden brown colour and sound hallow if you were to knock on the to with one finger,
- Immediately remove the warm loaves from the pans and allow them to cool on the baking rack completely.
- wait for them to cool completely before cutting them open. they are still baking inside and slicing them into a warm loaf will result in an under cooked gummy texture.


